Tag: Grafting

  • The Best Queen Cells

    The Best Queen Cells

    A year ago, the very idea of starting to raise queens at this time was madness, such was the hideous weather. This year, spring has been kinder, and I have already done my first batch of grafts. Now, I know that the easiest part of raising queens is making cells, and getting virgins well-mated is an important (and not always possible) step, but today I’m going to describe how to make the best possible queen cells.

    In my opinion, the steps involved with making queens, with associated difficulty levels, are as follows:

    1. Selecting breeder queen – as long as you keep notes, this is not very difficult. I choose the queens that made me lots of honey last season, showed no signs of swarming, were well-behaved, and healthy. Normally, they are going into their third season, but if I buy an inseminated breeder queen, she could be much younger. With bought queens, I trust the breeder. The other thing I try to do is use queens from different lines every year; a breeder queen only provides daughters for me for one season. I want to minimise inbreeding and maximise diversity, while still keeping pleasant and productive bees. Difficulty level 3/10.
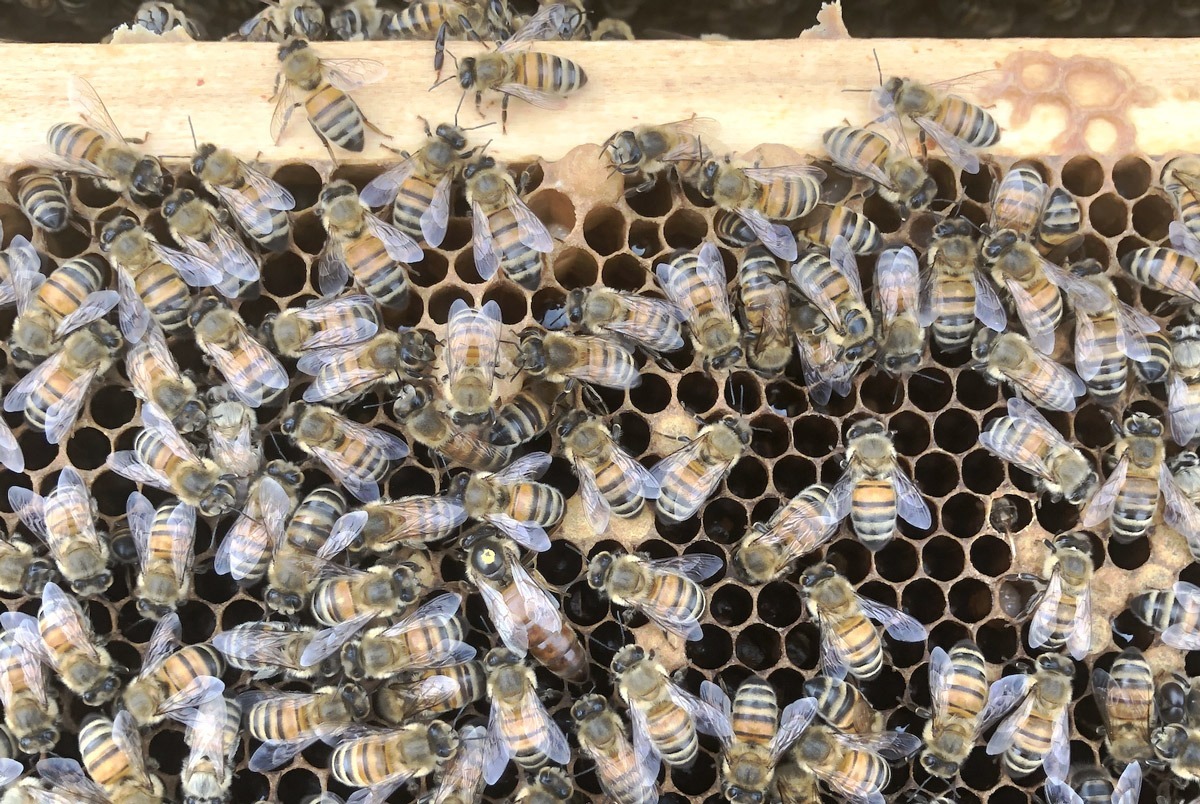
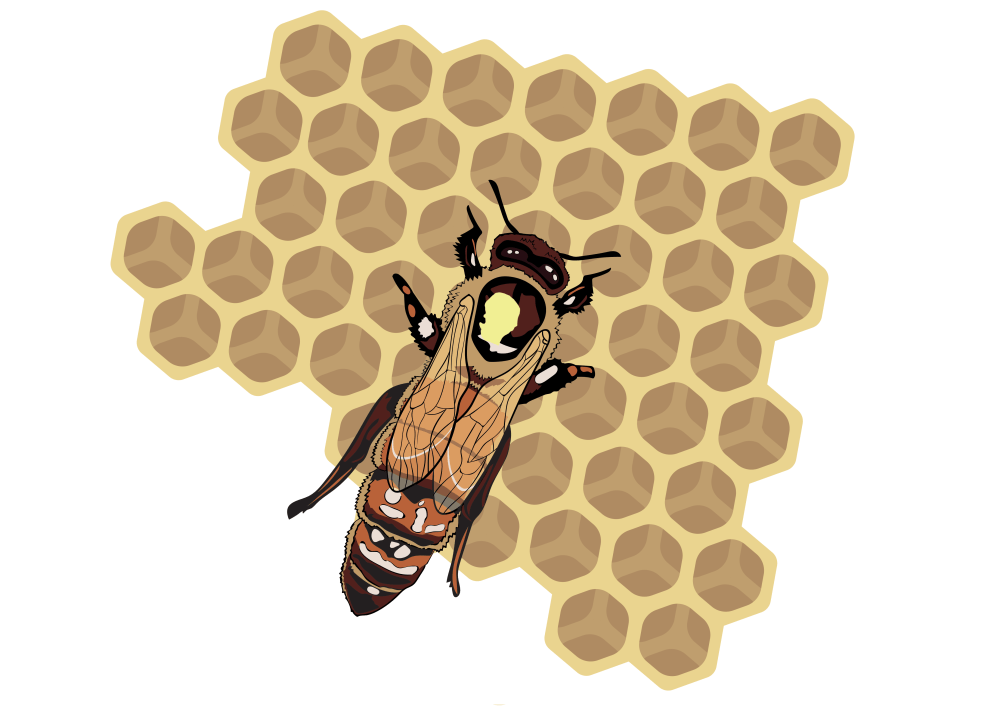
    2. Making queen cells – there are many ways to do this, and you have to find what works for you. I like grafting, which is not difficult, but it might take a few goes to get into the swing of it. My son picked it up straight away. He uses a bright light and his naked mole eyes; I use some magnifying lenses. We graft into JZBZ cell cups. Once the cells are made, they are easy to handle, whereas if you do the Miller method (no grafting), it’s fiddly to cut the cells from the comb. I’ll talk about this in more detail below, but it’s easy enough. Difficulty level 6/10.
    3. Getting virgin queens mated – this can be a demoralising stage because it’s not going to happen if conditions are poor. They like a pleasant, sunny day, and sometimes those are hard to come by in these parts. We use cell protectors, then place the cells into mating nuclei. The nuclei can be mini-plus or full-sized nucs, or those baby ones (Apideas and Kielers), and must be populated with young bees and have food stores available. Difficulty level 7/10.
    4. Introducing mated queens to a new colony – after all the effort of producing a beautiful mated queen, it is very annoying if, upon introducing her to a new colony, they kill her. This happens surprisingly often. There are many theories and methods surrounding successful queen introduction, but I won’t go into them here. Difficulty level 8/10.

    I might give them different scores in a week’s time, but that’s where I’m at today.

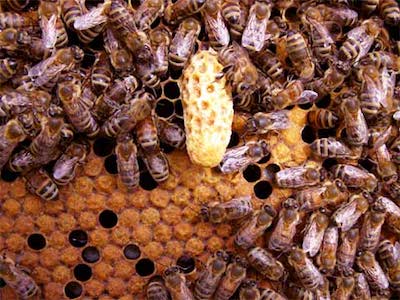
    Anyway, I wanted to write about how to make the best queen cells, which will hopefully go on to make the best queens. I have tried quite a few approaches, and I always come back to the method used by Brother Adam, Mike Palmer, and others. What I want to see are big, juicy queen cells with loads of jelly visible in the translucent JZBZ cup, showing that the developing queen has an excess of nutrients to aid her development. The method I will describe achieves this.

    Time of Year

    Theoretically, you can make queen cells anytime, even when it’s snowing. As long as the right conditions are in place within the cell builder, the bees will build cells. However, the time when all the stars align, when it seems to go best of all, is early in ‘swarm season’. For me, this appears to be from mid-April to the end of May, but it can vary. Last year, swarming got pushed into June/July because the spring weather was so bad. When the bees are making preparations to swarm is a great time to make queens – it’s what they want to do anyway.

    Cory Stevens actually uses colonies that are building swarm cells as cell-builders. He gets rid of the cells made by the bees and adds his grafted larvae. The first round may not be as good as the second because initially, there is competition from other larvae on the combs. Once these are removed, the only way for them to make a queen is to use what the beekeeper has provided.

    You need there to be drones in hives, of course. I have lots of them wandering about in my hives already, and even if they have just arrived, they should be sexually mature and ready for mating three weeks after emerging. I found my first (and only, so far) charged queen cell in a colony on 11th April. No doubt the warm and sunny weather was a factor in bringing them along so quickly. Although we are back to grey skies and 16 °C, I have faith that I will get some good mating days in early May. And if not, I will have to kill unmated queens and try again.

    Bees drawing out drone comb
    Bees drawing out drone comb (2nd April 2025)

    I do make queens into July, and sometimes August, but at such times there is much less brood in hives; brood which I need to create a strong cell-builder with an excess of nurse bees. I also have to feed syrup and pollen patties later in the season, whereas right now, natural pollen and nectar is everywhere.

    Cell Building: Step One – sealed brood

    As part of swarm prevention, we remove a frame or two of sealed brood from colonies that are booming and likely to swarm if not so treated. These brood frames go into nucleus boxes and are brought to my home base, where the queen-making happens. Moving frames between apiaries is risky, so make sure you are aware of the symptoms of disease, or don’t do it. Mike Palmer keeps ‘brood factory’ nucs on the same site as his cell builders.

    We add 8 frames of sealed brood to a brood box (Langstroth). The other two frames will be mostly stores, especially pollen. This brood box will be placed on top of an already strong colony, to make a super-strong colony in a few weeks. Firstly, we go through the colony to make sure that there are no swarm cells and the queen has plenty of laying space. Above that, there is the excluder and two supers. We place a second excluder over the supers, then put the brood box with sealed brood on top.

    We return about a week later to find and remove any queen cells made in the top box. This is important; a rogue virgin queen will mess things up.

    Cell Building: Step Two – make it queenless

    Ten to fourteen days after adding the box of sealed brood, it’s time to split the hive into two parts. One part will have the queen, but not many bees. The other part will be a monster, bursting with bees, but no queen.

    We place a new floor beside the existing hive, pointing in a different direction (typically perpendicular). Onto this goes the bottom brood box – the one with the queen, and later on, it gets a super on top too.

    The queenless hive is set up as follows:

    • floor
    • super
    • brood box (the one that had the sealed brood, now largely emerged)
    • roof

    Later in the season, there would be a cover board on top with a bucket-type syrup feeder over the feed hole, but this doesn’t seem necessary early on, unless the weather turns bad. The super on the floor causes bees to move nectar upwards, which is what happens during a honey flow.

    We shake lots of nurse bees from frames in the queen-right hive into the queenless one, making sure that the queen stays where she is (out of the cell builder!).

    Cell Building: Step Three – grafting

    Next, we grab a frame of eggs and young larvae from our selected breeder queen. These are in nucleus colonies on the same site. The bees are brushed off, and the frame is carried to our grafting room, which is a converted shipping container where we also extract honey.

    The Mole and I graft a row of cups each, which is around 24-30 of them. Mine are on the top row and his go below. We have just purchased a bright LED table lamp to help see larvae of the right size, which are those closest to eggs on the frame – they are less than one day old. We use the Chinese grafting tool or, if the comb is soft, a fine paintbrush.

    The frame of grafted larvae goes into the centre of the brood box of the cell-builder, with a frame of pollen alongside. The frame from which we grafted the larvae is returned to the breeder queen’s colony.

    Queen cells on grafting frame
    Queen cells on grafting frame

    Cell Building: Step Four – recombine

    We take a sneak peek at the grafting frame after three days, to make sure that queen cells are being made. If all goes well, we will have at least 80% success, which means around 20-24 big, fat, gorgeous queen cells. Next, we recombine the colony. The brood box to the side, with the queen, returns to its original place on the original floor. Then the excluder, then the supers, the other excluder (belt and braces), and the brood box at the top with the cells in it.

    Cell builder hive
    Cell builder hive after being re-combined

    Cell Building: Step Five – incubator

    On the eighth day after grafting, we remove the grafting frame, brush off the bees, and carefully carry the delicate cells to the incubator. We have a Carricel portable incubator for moving cells, which keeps them warm. Each cell goes into a roller cage, which goes into a layer of foam in the incubator tray, which has holes in it (so that the roller cages can stand up in the holes). The incubator temperature is 34.5 °C, and we put some water in a tray at the bottom to keep up the humidity (60%-80%).

    Cell Building: Back to Step One

    At this point, we can do it all again! Split the hive into a small queen-right one to the side, and a strong cell builder into which the next round of grafts can go. Another 24–30 larvae, to make 20–24 cells. This can be kept going for a bit, but after the second round you really need to add more sealed brood, and the top box is beginning to get some honey stored in it. I normally stop after the second round and just allow this giant colony to make an enormous honey crop. I set up another cell builder later on, once my new queens have got mated and moved to full-sized nucs or hives.

    Cell Building: Step Six – mating nucs

    Two days after going to the incubator, the cells get moved to the mating apiary, and placed in nucs with a cell protector (orange plastic ones made by JZBZ). The nucs are small queenless colonies which have bees, stores, and often brood. We break up our over-wintered mini-plus ‘towers’ into single boxes, each with bees, brood, and stores. We may also put a queen cell into a nuc made up from ‘spare’ brood and bees taken from strong colonies.

    I may sometimes even resort to using Kieler nucs, if I have more cells than I know what to do with. However, I would rather use the cells to re-queen any colonies that have made swarm cells or those with old queens (in their third season). If a colony is going to swarm, I remove the queen in a nuc, destroy all swarm cells, and add a cell from the incubator (it must be protected). Based on Cory Stevens’ experience, I could use that colony as a cell builder if required. We will collect the royal jelly from the destroyed swarm cells and freeze it for later use, maybe. That’s the plan, anyway.

    Newly emerged virgin queen bee
    Newly emerged virgin queen bee

    Oh, and sometimes stuff happens, and I get to the incubator later than planned, and I find emerging virgin queens. I quite like them, but introduction to established mating nucs can be a problem (a protected cell works; virgins can get killed). Virgins are probably best introduced to full-sized nucs or hives which have been rendered hopelessly queenless. The good thing about virgins is that you can examine them to ensure that they are large and healthy. Sometimes good-looking queen cells do not contain viable queens.

    Jay Smith (1871–1958)

    In his book ‘Better Queens’, Jay Smith described how he found a way to make the very best queen cells. After producing thousands of queens by grafting, he eventually came to the view that better cells could be made by cutting a row of eggs from a comb and sticking it to a top bar, which could be used instead of grafted larvae. I tried this once, and made a right pig’s ear of it, so I’m happy with grafting.

    Final Thoughts

    It might be argued that using one of those Jenter or CupKit systems should achieve a similar result, as queens could be made from eggs rather than young larvae. This might further be enhanced by trying to utilise the ‘maternal effect’ which David Evans has written about. To achieve that, you’d need to make artificial queen cups (larger than worker cells), and persuade the queen to lay into them.

    I know that you can make good queens using smaller cell builders than the gigantic one that I have described above. However, I know from my experience, and that of Brother Adam, Mike Palmer, Jay Smith et al., that the best cells come from a colony that is on the edge of swarming. If they are bursting with young bees, with plenty of good nutrition, they make better cells. They just do.

    David Kemp Raising Queens at Buckfast late 1960's
    Raising Queens at Buckfast late 1960’s (David Kemp)

    Of course, if you don’t want 50+ queens, and you don’t have many colonies, this won’t be for you. There are plenty of small-scale approaches, but this is the one that I have found to be the best. I also know people who use smaller cell builders, typically five frames over five in a double nuc, with great commercial success, and they know more about queen production than I do. So there are plenty of options!

    podcast link
  • Only The Best of Queens

    Only The Best of Queens

    I imagine that we all have our heroes. On the matter of producing queens, mine are Jay Smith & Brother Adam (both no longer with us) and Mike Palmer (alive and well). The teachings of these talented individuals are about what they do, or did. They are practical and honest, and generally, they subscribe to the school of, “this is what works for me, and these are the lessons and steps that got me here; what you do is up to you.” I respond to that approach.

    Jay Smith

    Many readers in the UK will not have heard of Jay Smith. He was born in 1871 in Illinois, and moved to South Dakota at the age of 12. He said that it was the book, Langstroth on the Honey Bee, which set him on the path to becoming a good beekeeper. Here is an extract from Jay’s book, Better Queens:

    One day, in 1912 State bee inspector, Dan Urbaugh, came to inspect my bees. I remember he stood for some time in silence watching the flight of the bees. Then he turned to me and said, “Why don’t you sell some queens?” Then he said, “Those are the finest bees I ever saw.” I asked him how he could judge bees by merely looking at them.

    He replied, “I can tell by the looks of them and by the way they act. Here

    I am right among them and none offers to sting.” Having had little

    experience with bees except my own I took it for granted all bees were like

    that. I told Dan that I would greatly enjoy rearing queens if I could sell them. I shall never forget how he looked at me and replied, “Sell them, why of course you can sell queens like these and you will not have to do much advertising either.”

    Astonishing Difference

    What is the point of making queens anyway? Apart from the sheer joy of doing it?! In the opinion of Jay Smith, it’s only worth doing if you are going to make the “best of queens.” Anyone can make rubbish queens, but why bother? Many hobby beekeepers, with just a couple of hives, have never seen a truly great queen. The difference is quite astonishing. A colony headed by a great queen is calm on the comb, gentle, less prone to swarm, and almost certainly makes a lot more honey than others.

    Newly emerged virgin queen bee
    Newly emerged virgin queen bee

    For anyone, the advantage is in having bees that are a pleasure to work. For those of a more commercial nature, fewer swarms and more honey per hive mean more profits. Smith contrasts a bee farmer with 2,000 hives, who re-queens by making splits with another who has 250 hives and makes his own queens, re-queening regularly. The queens produced from old comb and the lower population of a split hive are not so good, which means the farmer with more hives must hire many helpers to deal with swarm control and keep them alive. By contrast, the farmer who makes his own excellent queens has vast honey crops, up to 200lbs per hive, with healthier bees and a healthier balance sheet.

    All About the Jelly

    Bees do a fantastic job of raising queens, especially at swarming time. The cells that they make are large and packed with jelly. As Mike Palmer says, “it’s all about the jelly.” The queen rearing method that Mike uses is taken straight from Brother Adam. Large colonies bursting with artificially high numbers of nurse bees, well-fed, with no queen, will start beautiful queen cells. I use JZBZ cups, which are translucent, so I can see that they are full to the brim with white royal jelly. The idea is that the young grafted larvae are given an excess of nutrients, beyond anything that they need, to ensure that they have the best start.

    Mike uses a queen-right finisher, as many commercial queen makers do. In his case, he moves the brood box containing the queen to the side, rotated 180 degrees, when making the cell starter. The box is returned a few days later to make the finisher. These monster cell builder colonies are not only great for making the best of queens – they also produce a lot of honey.

    It is known that the conditions in which cells are raised matters a great deal to the outcome. Even the most illustriously well-bred queen, from a proven breeder queen and drone line, will be hopeless if something goes wrong during her development. If the cells are shaken, or receive less than copious feeding, or the temperature is too high (heatwave) or low (too few bees), the queen will most likely be rubbish, despite her genetics. However, a queen raised under ideal conditions, getting the best of everything during her development will often turn out to be a good queen, regardless of parentage.

    Non-Grafting, No Problem

    For those who struggle with grafting, Jay Smith may offer some hope. I think grafting is the best way to make queens, but I can see well and have been doing it for long enough to find the process elementary, dear Watson. It took a few years and an eye operation to get good, though. After 33 years of making thousands of excellent queens using grafting, Smith eventually found a non-grafting method which he found produced consistently beautiful queen cells throughout the season. Personally, I think that the fact that grafting is the ‘industry standard’ across the world suggests that it’s the best approach. If something else was better, why isn’t everyone doing that?

    Jay’s ultimate system needed freshly drawn new comb in which the breeder queen would lay her eggs. He found that the new soft comb led to the best queen cells. He would cut a strip of comb with eggs in out of the frame with a sharp knife, then attach it to the cell bar with melted wax. Then he would squash cells as follows:

    Xx0xx0xx0xx0xx0xx0xx0xx0xx0xx0xx0 where ‘x’ is a squashed cell and ‘0’ is one containing an egg.

    Queen cells made by Jay Smith using a non-grafting method
    Queen cells made by Jay Smith using a non-grafting method

    The bees draw out the cells into perfect queen cells. Jay Smith believed that the soft wax combined with the use of eggs rather than newly hatched larvae led to his best queens. Obviously, the cell builder also needed to be bursting with well-fed nurse bees.

    Non-grafters may wish to try to copy Jay’s method. It seems to me that the Miller method, using freshly drawn comb, would theoretically achieve the same thing. The Jenter and Cupkit devices also allow one to side-step grafting, but the cells are drawn out on plastic cups rather than soft wax. That’s never been a problem for me, so I reckon if my eyesight starts to fade I’d probably try the Nicot Cupkit system. It’s well-thought-out, and many people use it with great success.

    Buying Queens

    Finally, if you want to find out what all the fuss with great queens is about, why not try buying a few queens from somebody who specialises in supplying them. You can see for yourself how your purchased queen compares to your others. Then, you must decide if you want to make your own great queens, buy more from your supplier, or carry on with what you’ve got. To me, settling for ‘average’ queens is making beekeeping more work for lower rewards, so it’s “the best of queens” for me.

  • Queen excluders: are they needed for successful beekeeping?

    Queen excluders: are they needed for successful beekeeping?

    Answer: it depends. That is always the answer for every beekeeping question, or so it seems. Actually, there is one which is always ‘yes’ – see end of this article. When I had kept bees for only two or three years, I decided to forego queen excluders, to see what happened. This is actually quite worthwhile, even if you only do it on a couple of hives, just to observe what bees do when given space and freedom to roam. My biggest ever colony, which was much taller than me, 6 ft (1.83 m), happens to have been one of the ones without an excluder. Unfortunately, the farmer clipped it with his tractor, and it crashed to the ground. The bees exacted their revenge on the fleeing farmer’s head, and then on me as I put it back together again. Anyway, queen excluders: are they needed for successful beekeeping?

    Honey excluder by proxy

    When I learned about beekeeping, initially from evening classes at my beekeeping association, and later from books, the queen excluder was simply part of the hive. It never occurred to me that you could survive without one. Every picture of a hive showed an excluder sitting above a single brood box. It was as important as the roof, as far as I was aware. Later, I discovered exotic practices, such as ‘double brood’ and even the outrageous idea that a queen excluder is, in fact, a honey excluder. I’m in no doubt that it’s not, by the way. However, it could be a honey-excluder-by-proxy (HEBP) if it led to over crowding in the brood nest, causing the bees to make swarm preparations. Wow, HEBP – it just rolls off the tongue, doesn’t it?

    Stored plastic queen excluders
    Stored plastic queen excluders (Paul Horton)

    The purpose of the queen excluder is to prevent her from moving from one area of the hive to another. It does not always work. I have found that my framed wire excluders can be quite leaky, so now I tend to use those flat plastic ones. They are cheaper and seem to work better. Going back to the BIG QUESTION, I believe that the answer is YES. Queen excluders are indeed needed for successful beekeeping if your beekeeping involves raising queens. I would further argue that every beekeeper with more than ten hives should try to raise some queens, but I digress.

    Essential for raising queens

    If you wish to graft larvae from your prized breeder queen, it helps to know for certain that larvae of the right age will be available and conveniently located on one frame. I trust to luck, and mostly that works, but a vertical queen excluder in the breeder queen’s hive can guarantee success. The queen can be placed on a frame containing empty comb and separated from other combs using a vertical excluder. Then, four days later, the comb will contain larvae of the right age because the queen had nowhere else she could lay. It’s a bit awkward making a groove in the hive walls and cutting the excluder so that it slides into place snugly, but it can be done. Bob Bonnie calls it a ‘timing box’. Top tip: use a dark comb or a plastic frame to make grafting with a Chinese grafting tool easier.

    Bob Bonnie explains the ‘timer box’

    Most people who raise queens like to use a queen-right finisher. Cells that have been started off in a queenless colony are placed in a box above a hive containing a queen, but the boxes are separated by supers and one, or even two, queen excluders. Without excluders, there is a risk that the cells would be destroyed, which would be demoralising and a complete waste of resources. I have messed about in the past with re-queening a colony by putting a sealed queen cell in between super frames, then removing the excluder once the virgin has emerged. The idea is that, to the bees, it’s like a supersedure. Once the new queen is mated they will get rid of the old queen and, hey presto, you re-queened a colony with minimal effort. To be honest, it worked for me 50% of the time, but that was only 1 out of 2. Not really a rigorous test.

    Other excluder uses

    Another good use of an excluder is when doing the Ian Steppler boosting method, in which a small colony is placed above a strong one (both have queens). He uses newspaper too. Without the excluder, one queen would be killed, which would be about as far from a ‘boost’ as you could get. Moreover, the Demaree method, as originally described, could not work without an excluder.

    How about this. If you want to harvest a load of nurse bees – to put into mating nucs, for example – you can use an excluder. If you put a box containing open brood above a strong colony with an excluder between boxes, the nurse bees will move up to look after the brood. Drones and the queen can’t get up there. You can then shake the frames, knowing that the queen is safe, and you have got nurse bees for your mating nucs.

    The main event

    Of course, the main use of queen excluders is to keep her majesty away from honey supers so that you don’t get brood mixed in with honey. Or it could be to keep the combs in the honey supers nice and light (brood makes the wax go dark). Some people are not too keen on extracting honey from combs that have had brood in it. I don’t think it’s a problem because the bees clean out cells and polish them, applying propolis as they go. However, if frames have had amitraz strips or other chemicals near them, they should be kept for brood, I think. I haven’t used amitraz for ages as thymol, oxalic acid and formic acid seem to do the trick. Thymol would surely taint the honey, but these things get applied when honey boxes have been removed.

    For the last 7 years I have used excluders in the way that is normal, at least in the UK. They keep the queen from the supers at all times. I’m thinking of going to a sort of hybrid system this coming season. The idea is that in spring and early summer, as the colony is in rapid expansion mode, I will add boxes as the bees need the space, but minus the excluder. This gives the queen the chance to go where she wants and to create the brood nest that works for her. No artificial crowding into one box. However, as we get past the June solstice, she can be shaken (or placed) down into the bottom box with an excluder overhead. She will be laying fewer eggs from then on, and the swarming season will have (theoretically) passed. Any brood upstairs will emerge, and the cells will be cleaned up and used for the forthcoming honey flow in July.

    In the past, when I didn’t use excluders, the queen moved down as the season progressed anyway. She tended to have her nest mostly in the second box up from the bottom, with honey in the boxes above. The bottom box often had a bit of pollen and little or no brood, plus numerous older bees who wanted to kill me, so I didn’t go down there much. The hybrid idea, in which the queen is confined to a single brood box from July onwards, might mean less swarming and more honey. We shall see.

    The answer is yes

    Finally, the question to which the answer is always yes: “If I don’t monitor varroa mite levels in my colonies, and I don’t live in some remote part of Scotland where mites have yet to arrive, should I treat?” Oh, and following on from that, “should I treat every hive in the apiary at the same time?” Yes!

  • How I Make Queens

    How I Make Queens

    Grafting, Cell Builders And Mating

    I’m good at learning from the successes, mistakes and wisdom of others. Once, we had a fishing tournament at school that I’d entered. Never having fished before, I consumed a library of books on the subject and, incredibly, I won. It wasn’t difficult; I think I caught two fish and nobody else caught any. However, being good at fishing took many years of doing it for real. It’s been a bit like that with beekeeping, particularly queen rearing.

    So, without further ado, I will describe how I make queens. It works for me. I don’t do anything radical, and I’m sure I can improve, but here it is:

    Selecting A Breeder Queen

    Who should be the mother of the next generation of walrus queens? This question follows me and occupies my mind for much of the time. I keep notes on the performance of my colonies and use a basic scoring system to choose a queen from which to graft. I want her to be in her third season or later, so I know how she’s done over more than a year. I allocate a score out of five for honey production, temper, and mite count. I usually do an alcohol wash in June; a low mite count is obviously a good thing.

    Over the winter, I choose a few breeder queen contenders and hopefully, one or more of them will still be around in the following May. Also, I use a different breeder each year, regardless of how good she is. About every three years I buy a breeder queen from somebody who knows what they are doing.

    Making A Cell Builder

    I choose a strong colony that has not quite gotten to making swarm preparations. Typically it will have a super or two filling up nicely with nectar. Then I remove all frames of sealed brood and put them into a new empty brood box, leaving the queen in her original box. I add frames of drawn comb to the box with the queen, then onto this goes the queen excluder and two supers. This is followed by another queen excluder and the new brood box containing probably four frames of sealed brood (Langstroth). 

    As I inspect my other colonies, particularly nucs, I remove frames of sealed brood and replace them with foundation frames. This is to prevent swarming by weakening them slightly. A six-frame nuc with three sealed brood frames will shortly burst with bees. The brood frames I remove go into the top box on my cell builder. When it’s full, on goes the cover board and lid.

    A week later, I shake bees off every frame in the upper brood box and destroy any queen cells. 

    Grafting Day

    It just takes a bit of practise

    Around ten to fourteen days after setting up my cell builder colony, it’s grafting day. I place a new floor to the side facing in a different direction. Then I take off the top box and put it on an upturned roof. I move the bottom brood box (containing the queen) to the new floor. The top box (queenless) goes onto the original floor. I check again for any queen cells, just to be sure there aren’t any. I shake about six frames of bees from the queen-right box into the queenless one, ensuring that the frame containing the queen is not one of them. 

    The queenless hive on the original floor is now my starter colony. The other hive with the queen has the two supers. Next, I go to my breeder queen’s hive and pull out a frame containing eggs and very young larvae. I take this frame to a nearby shed and graft 16 to 20 larvae into JzBz cell cups on a grafting frame. I use magnifying lenses, a head torch and a Chinese grafting tool. This takes very little time, and I try to get the frame of grafted larvae into the starter hive as quickly as possible. 

    I have to remove a frame from the centre of the starter hive and replace it with the grafts. Then on goes the cover board and a bucket feeder containing sugar syrup. Recently I have dissolved Vitafeed Nutri into the syrup, which they very quickly devour. 

    Re-combining Into a Finisher

    I return to check on my new queen cells in four days. Assuming all is well, there will be plenty of white jelly visible in the base of the cell cups, showing that the developing queens have been well fed. I return the hive to its original configuration with the queen in the bottom box, two supers and the cells in the top box over an excluder. 

    My cell builder set up
    Re-combined hive with sealed cells in the top

    Getting Mating Nucs Ready

    Every queen cell I make will have to go into its own hive. My over-wintered mini-plus hives get split up into single boxes and made queenless. Each one of these will get a queen cell the following day. 

    Removing The Queen Cells

    Nine or ten days after grafting, I remove the frame with the cells and find a home for them. If I’m putting a cell into a queenless nuc or hive, I use a plastic cell protector so that the bees cannot kill it before the virgin emerges. I also put cells into my incubator in roller cages as when the virgins emerge, they will go into Kieler mating nucs.

    Kieler Mating Nucs

    Brightly painted Kieler mating nucs
    Gloss paint slightly melts the poly so it becomes a hard shell

    When setting up Kielers for the first time, I make them up when my virgins are born. I put a tiny drop of honey in the bottom of the roller cage (in a space on the edge of the lid) so that the virgins can feed. I shake bees into a deep tray from the supers of several hives; the foragers fly off, leaving lots of nurse bees. Each Kieler nuc gets a cup of bees and a piece of fondant in the feeder. A virgin queen goes into each then they are sealed up and left somewhere out of direct sunshine for a day or two. 

    I move the Kielers to another apiary and open up the entrance. It doesn’t take long for bees to appear and start orientation flights. 

    Checking For Eggs

    After two weeks, I will check to see that my new queens are laying eggs. If I see the queen but no eggs, I leave them for another week before checking again. Sometimes there is no queen. Sometimes there are no bees at all. Mostly it seems to work, though. In small nucs like Kielers, the comb quickly fills with brood, so the queen must be caught and moved on to a three or six frame nuc, or maybe a hive using a push-in cage. 

    Marking, Clipping, Queen Cages

    When I get virgin queens from my incubator, I mark them straight away. Obviously, clipping cannot be done now; they still need to go on mating flights. 

    As I catch mated queens from their boxes, I mark them if required and clip one wing. It’s not always easy catching queens in tiny little mating nucs. A good tip is to spray some water on the frame containing the queen so that she can’t fly off. Sometimes she’s not on a frame but crawling up the walls hiding. The real fun starts when, having got her majesty into a cage, you have to add six workers. It’s a case of picking them up by their wings and quickly popping them into the cage before they realise what’s happening. 

    And that, in a nutshell, is how I make queens. Pretty much the same method as used by Mike Palmer, and going back a few years, Brother Adam

  • Temperature And Queen Colour

    Temperature And Queen Colour

    It’s a non-beekeeping day today, and we have had some much-needed rain overnight. This should not be unusual here in Manchester, but it’s actually been untypically dry. My bees have generally got off to a quick start this year. Many forage plants are available simultaneously, especially dandelion, apple, oilseed rape and trees such as horse chestnut. After the winter break, such a resource surge has got the bees in a frenzy. Hawthorne seems to be coming on too. I fear that everything will be over in May and that the June gap is on the cards; sometimes we get one, sometimes not. 

    Cat Pee?

    My bees certainly love dandelions. This is all well and good except for the unpleasant odour imparted to the hives. I have heard it described as like old socks or cat pee. I just sold a couple of nucs at an auction, and I wonder what beginners might make of the stench when they open up the box and place the frames into their new home.

    Navigating the June Gap

    Presumably, in a June gap, the thing to do is remove supers and possibly feed a little syrup/pollen sub to keep the bees strong for the summer nectar flow, if it comes. I’ve never done any of that clever stuff. I think in a June gap, my bees eat half of the honey, and the queen slows down her laying rate. I haven’t produced the vast honey yields that some bee farmers get. Managing tricky periods when forage is unavailable makes a big difference by the end of the season. Of course, it’s not important if you aren’t bothered by how much honey you make. 

    First Graft of 2022

    There are loads of drones about, and hives are booming, so I thought I’d crack on with raising queens even though it’s a bit early by the calendar. A couple of days ago, I grafted my first larvae of the season; 24 tiny little babies all lined up in their JZ-BZ cell cups. My cell builder is the same set-up as last year, which worked well, but I’m anxious until I see queen cells full of jelly. The grafts go into the top box of a Demaree; the queen is down in the bottom – I have not made them queenless. She is below a couple of supers and queen excluders.

    Jelly Babies

    It makes me nervous because many people use a queenless starter followed by a queen-right finisher. Still, Jolanta up in Blairgowrie keeps them queen-right throughout. Mike Palmer moves the bottom box with the queen away for a few days, then recombines it later to make a finisher. There are many ways to make queens. The amount of effort required means that it’s worth making great queens. Mike says, “It’s all about the jelly”, so if I see that the cell cups are full of the milky substance right up to emergence, I know I did my part.

    Having an excess of royal jelly to consume from a very young age (day 4 after the egg was laid) is a significant factor in raising good queens. The other two big variables are the mother’s genetics and the temperature/humidity in which the cell is kept as the new queen develops. I’ve been delving into some old research to see what effect temperature has. I mean the temperature at which the bees (or incubator) keep the sealed cell as the pupa grows into a queen.

    Timing is Critical

    The typical timings for queen development are shown on the chart below. I’ve been caught out before by queens emerging earlier than I expected, with unfortunate results. Could this be that sometimes I graft a larva that is 1.5 or 2 days old (4.5-5 days after laying) and/or could temperature be a factor? I can’t do much about the temperature that bees maintain in the hive, but the incubator is another matter. 

    Sorry for the quality – chart shows timings for raising queens

    Incubator Temperature Matters

    Some old research by Marla Spivak et al. called Influence of Temperature on Rate of Development and Color Patterns of Queen Honey Bees makes fascinating reading. Once cells were capped, researchers put them into an incubator and kept them at a constant temperature until emergence. The total time from egg to a virgin queen is typically 16 days. The research shows that lower temperatures extend the development time:

    31.5 Celsius (89 deg F) = 18.1 – 18.4 days

    33.5 Celsius (92 deg F) = 16.4 – 16.9 days

    35.5 Celsius (96 deg F) = 15.1 – 15.7 days

    These temperatures were for the period after the cells were sealed (they went into incubators). It also turned out that the line of queens with darker genetics was quicker to develop than lighter queens. What I did not expect was this:

    Incubation Temperature Effects Colour

    Colour patterns of honey bees are heritable, although this study demonstrates that pigmentation is significantly influenced by temperature during the post capping period. Queen bees that develop at the low end of the range of brood nest temperatures will exhibit darker colouration than if they developed at the high end of the temperature range. If brood nest temperatures are maintained at only 3-4°C lower during cooler months of the year, darker queens will emerge, whereas, in the warmer months, queens of the same genetic composition will be lighter in colour. 

    which leads to:

    Many apiculturists select queens on the basis of colour as an indicator of subspecies, lineage, and behavioural characteristics (such as docility or honey production). Taxonomists have traditionally used colour patterns on the abdominal tergites as a character to distinguish subspecies of A. mellifera (Alpatov 1929, Ruttner 1988). If queens are reared at the extreme ranges of brood nest temperature or at times of the year when ambient temperatures are low or exceptionally high, colour patterns may not be reliable indicators of subspecies, lineage, or behaviour unless queen rearing conditions are taken into account. 

    What About Quality?

    I know what you’re thinking – that unscrupulous queen sellers could manipulate the colours of their queens by varying the incubation temperature. Then all those people who believe that local queens are black will be satisfied. What about queen quality, though – will it suffer if the temperature is low? From what I can tell, it seems that 32-35 deg C is a safe range. The thermometer on incubators is not always the most accurate, so there’s that issue too.

    I found some research done in Poland in 2015 called The Quality of Honey Bee Queens from Queen Cells Incubated at Different Temperatures which addresses this point. I am no expert at discerning the quality of research, so bear that in mind. They compared incubation at 32 deg C to 34.5 deg C and found, as expected, that the cooler batch took longer to emerge (27 hours longer). There was no significant difference in body weight, spermathecal volume, ovariole number in both ovaries, or onset of oviposition. So, the answer seems to be that if you stay within a safe temperature range, queen quality is the same throughout. 

    I don’t care about the queen’s colour, but I do care about being on hand to deal with virgins as they emerge rather than letting them die in their roller cages because I did not account for temperature. 

  • Any Beekeeper can make Queens

    Any Beekeeper can make Queens

    You don’t even need to be able to graft larvae to make good queens. Apparently, grafting puts a lot of people off, because they find it too hard or they heard that it was difficult and didn’t try. I think it’s like most skills; at first, you are a bit rubbish, but with practice, it gets more natural, and your skills develop. I am okay at grafting, but I’m quite slow. This is not a problem for me as I’m not doing hundreds of queens. My goal is to try to transfer the tiniest larvae without damaging them so that they are accepted by the queenless starter hive.

    Tiny larvae a few hours old

    When I started grafting, it took me a few attempts to find magnifying lenses (jewellers loupe) that suited me, and I’m still pretty sure that I could improve my set up. Next, I grafted larvae that were too big. The correct larvae to graft are incredibly tiny – almost invisible. They are no bigger than eggs and are hard to see because they are translucent, sat in a little puddle of bee milk. My left eye is excellent, but not at short distances, and my right eye is foggy as the lens has a frosting of hydroxyapatite on it (long story). I manage fine.

    Books on Raising Queens
    Books about Raising Queens

    There is a mountain of evidence showing that the “best” queens are made by starting off with the tiniest larvae. If the bees provide a newly hatched larva with copious amounts of royal jelly for the 5 days until the queen cell is sealed, you are in with a shout of a top-notch queen. If the nurse bees have access to a lot of fresh pollen of different types, and plenty of incoming nectar, they will do the clever bit and make all of the royal jelly they need. This is why, to make good queens, you need:

    • the tiniest larvae
    • loads of nurse bees
    • frames packed with a variety of quality pollen
    • a nectar flow
    • no queen

    Different beekeepers find different ways to graft larvae. The two methods that I have come across are the Chinese grafting tool (most popular) and the tiny paintbrush or piece of grass options. Remember, you don’t have to graft at all but hang in there while I cover this.

    Chinese Grafting Tool 

    This is the most popular way to graft. Done correctly, the reed of the tool scoops up the larva and the puddle of bee milk that it sits in, depositing it gently in the cell cup. The best frames to use for this are those that have gone dark with hard wax. If the comb containing the larvae is soft and new, the grafting tool will not slide nicely underneath; it will just puncture the wax and make a mess. Randy Oliver describes one approach in his Queens for Pennies article, which is very good. Whether or not you agree with his opening rant (I do), please read on to learn about grafting.

    Tiny Paintbrush

    For this to work well, you need the opposite type of combs; beautiful new soft wax. The idea is to break down the wall of the hexagonal cell containing the larva. It can then gently be lifted out and placed in the queen cup. By the way, you must not roll the larvae over because they will die if you do that. 

    Queen Cells, Photo bt Gianfranco Reolon
    Queen Cells, Photo by Gianfranco Reolon

    Non-Grafting Method

    Many years ago, a queen breeder called Jay Smith came to the view that he made better queens without grafting at all. I don’t know how true this is, but it certainly gives hope to those who just don’t fancy grafting. In his method, you also need the breeder queen to lay up a frame of soft, newly built wax comb. He selected comb with eggs in it and cut out a strip with a sharp knife. He had a long piece of comb one cell wide, and each cell contained an egg or young larva. This was then fixed to the underside of the top bar of a frame using melted wax. 

    Some of the cells were squashed down (x), and some had the egg left in (o). The pattern went xx0xx0xx0xx0xx0xx0xx0xx0 which gave space for queen cells, so they weren’t sticking into each other. The bar with the strip of eggs went into a starter hive (lots of nurse bees, pollen, nectar flow, no queen). Seems simple enough. The Miller method is even easier.

    If you only want to make a handful of queens you don’t need a “starter” and a “finisher” – just leave the bees to it and take out the sealed cells before the queens emerge. It’s safe to do this 9 days after grafting/putting the strip of eggs in. Then each queen cell can go into a queenless nuc or mating nuc so that she can emerge and get mated. The is something very satisfying about making your own queens.

    Genetic Factors

    I can’t control which drones my queens mate with, but I can control which queen’s larvae I select for making daughter queens. I’m happy with that, and mostly it works well. It makes sense to me to choose a breeder queen from a colony with positive traits. Some bees are unduly defensive (ankle stingers, jump at your hands as you pick up frames) and some are not calm on the frames; they run about and “drip” off the frame bottom. I don’t like those traits, so I won’t choose a breeder from those bees. 

    I also like the idea of selecting from bees that are less prone to swarm, although sometimes perfectly good bees do swarm. A hive that makes lots of honey has got a lot of positive traits; they came out of winter well, built up strong at the right time, didn’t swarm and didn’t get burdened by disease; they might be good bees to breed from.

    Lovely Drones

    Finally, don’t forget about drones. We need good drones to make good queens. If you have nice bees, give them a drone comb so that they can spread their drone goodness around. If you have horrible bees, scrape out the drone cells so that they can’t drag down the local population. And change the queen for a nice new one that you made from your best queen 🙂

  • Queen rearing: first attempt

    Queen rearing: first attempt

    About 2 years ago I had an amazing life changing experience. Ever since I was 7 years old I had worn eye glasses and I quickly became the shy boy with massive thick goldfish bowls on his face; eyes disappearing into tiny dots, and huge craters on my nose where they relentlessly pressed down on me. At the age of 51 enough was enough. I had lens replacement surgery at Moorfields Hospital in London by the eminent and very affable Julian Stephens. So now I have almost perfect vision and when I wake up in the morning I can actually see straight away, rather than having to fumble for the goldfish bowls. Sadly the first thing I usually see is a quite horrible lamp shade and a cracked ceiling caused by a loft conversion…I must do something about that one day.

    However, it turns out that there is at least one task for which my artificial super-eyes are unsuited, and that is grafting larvae. Non beekeepers may wonder what this is and why on earth anyone would want to do it, so I shall explain.

    Honeybees make new queens by producing queen cells (see picture). They are long alien structures which start off as a small cup of wax, shaped like the cup that an acorn sits in. Once an egg is laid in this cup the young worker bees spring into action. They add wax to the cup making it longer and longer until eventually they seal it off. Meanwhile the egg is fed with copious amounts of “royal jelly” (made by bees in their pharyngeal gland) and it soon becomes a tiny larva, which rapidly grows. Once the queen cell is sealed off the larva develops further into a pupa and at last, 16 days after the egg was laid, a new queen emerges into the world.

    One of the rites of passage of a beekeeper on his or her journey from novice to serious hard core ninja beekeeper is performing the noble art of queen rearing. This entails selecting a good queen and making more queens from her, which involves taking tiny larvae from their hexagonal cells and placing them gently into man made queen cups. These are then given to a hive with many young bees and no queen. They leap at the chance to make queens, and hopefully turn most of these grafted larvae into beautiful big fat queen cells. These can then be placed in their own little hive, called a nucleus hive, so that when the new queen emerges she can get on with the job of getting mated and laying eggs, and her colony can grow and prosper. And make honey for their ever hopeful keeper. Actually, I don’t think my bees know they have a keeper. Well, they should be grateful. I give them a nice house and keep them healthy, and all I ask in return is some delicious golden honey. They just get on with it and ignore me.

    Sounds easy enough, this larvae grafting, doesn’t it? Not so. I bought a magnifying glass and some reading glasses but found it very tricky to focus on the tiny larvae that I wanted to graft (move to an artificial cup). This had to be done with no gloves or veil but luckily the odd bee that had come along with me to my bee shed was not intent on anything malicious – they were mostly just curious. They had probably not seen a walrus with a magnifying glass before.

    I grafted 14 larvae and was expecting to get at least 8 or 10 queens out of this (some were bound to fail given my lack of experience). In the end I got 2. Two! All I can say is they had better be good. All that effort for two little insects. I put the sealed queen cells into nucleus hives and took them home to my garden so that the new queens can experience courtship and mating with Mancunian drones, which have a different accent to those near my apiary. They support a different football team too. The drones die after mating, but they die happy.

    I’m going to have another go at queen rearing as a score of 2 from 14 is not something to brag about. Not really ninja beekeeper territory is it? I’ll let you know how I get on 🙂